

How to Make Homemade Sushi
Homemade Sushi is so much cheaper than at the restaurant. Plus, It’s easy and fun to make your own rolls at home, so you can put all your favorite ingredients into your perfect custom roll – here’s how!
I’ll be very honest and say that there’s definitely a reason why sushi chefs spend a decade learning how to perfect sushi rice or cut raw fish like a boss, because it does make a difference. Homemade sushi will never be at the level of what you’d get from the top sushi restaurants in NYC, but here’s where homemade sushi rolls win:
You get to gorge yourself on a FEAST for like $20 whereas a similar amount of food at a restaurant would cost a couple hundred. Sushi is really fun to make at home. We have to find sushi grade fish like raw salmon. But if it’s not you can still make sushi at home by other fishes.
Shrimp tempura rolls are one of my favorites, or you could do a California roll using real or imitation crab, or you could even try a veggie roll. One of our regulars is Philadelphia rolls, with smoked salmon, cream cheese, avocado, and cucumber.
All of these sushi rolls are some times referred to as “maki rolls” which is any type of roll where ingredients like raw fish and vegetables are rolled with vinegar seasoned rice and nori. The sky is the limit when it comes to filling ingredients, and the best part is getting creative with your own rolls. Or if you want to try something a little different, you can make Korean Kim Bap. It’s fairly similar to sushi, but no raw fish.
What seaweed should you use for the sushi recipes?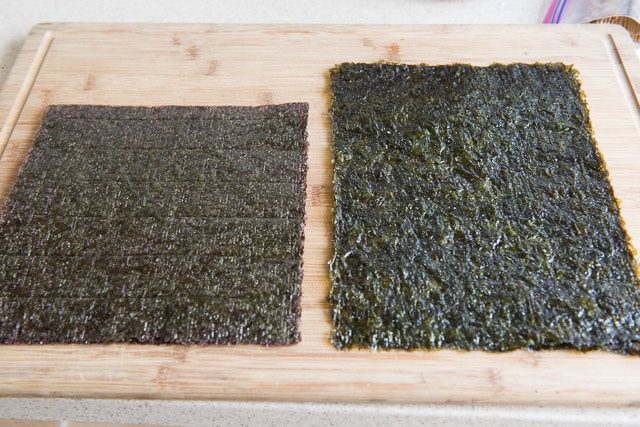
To get started, you need the right kind of seaweed. The one on the left below is thick and perfect for rolling (this is the one I use). The one on the right ios too flimsy. I use that seaweed for snacking. Make sure you get seaweed specific for making sushi, which it should state on the package. It will sometimes say “nori” on the package.
If the seaweed you’ve bought seems to have one side that’sshinier that the other, have the shiny side facing the rolling surface so that it’s on the outside of the roll. Then spread your sheet of nori with a layer of Prepared sushi rice (taht whole post covers how to make the rice), and flatten the top of the rice gently with a paddle, but do not smash the rice, as my mom would always say. And make sure not to neglect the edges of the sheet!
I cover details in-depth in that post, but I recommend a short grain rice, as well as a white rice, instead of brown. Long grain rice is usually not sticky rice, and that is an important factor for helping hold the rolls shut. I also season the rice with a sushi vinegar that has a touch of salt and sugar in. You may also add sesame seeds, if you wish.
Also know that the rice will be easiest to spread when it’s slightly warm or at room temperature, so prepare the timing right in advance for when you want to eat.
How much Fish You Need
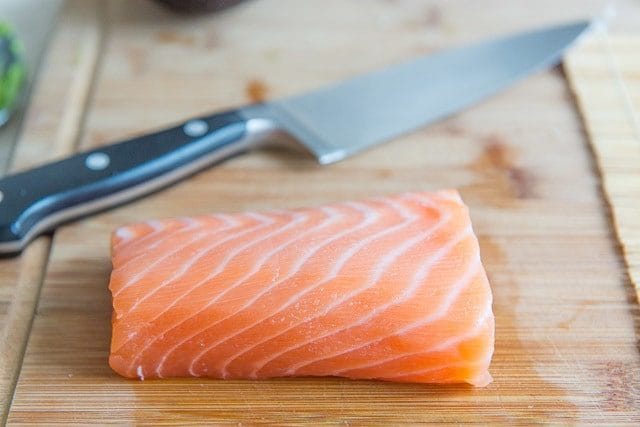
For my rolls this time, I got this gorgeous piece of salmon. It was a 1/2lb piece, and gave us enough fish for about 6 rolls, plus some snacking. Even at $28/1lb, which seems like a lot, paying $14 for that much fish is certainly worth it, and dirt cheap if you ask me!
How to cut raw fish for Sushi:
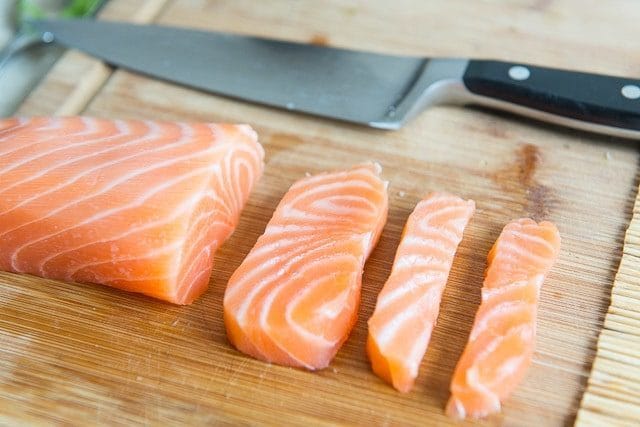
Here is how I cut salmon for my sushi rolls. First, cut straight down through the filet, then cut that piece in half through the center so you have a small strip. Make sure you’re using a sharp knife and gliding with one stroke, to get a nice clean cut.
Place your desired ingredients onto the sushi rice. I’ve got salmon, avocado, and cream cheese ( I know, I know. But Philly style rolls are my favorite, and making this at home is all about customizing the ingredients to what you enjoy):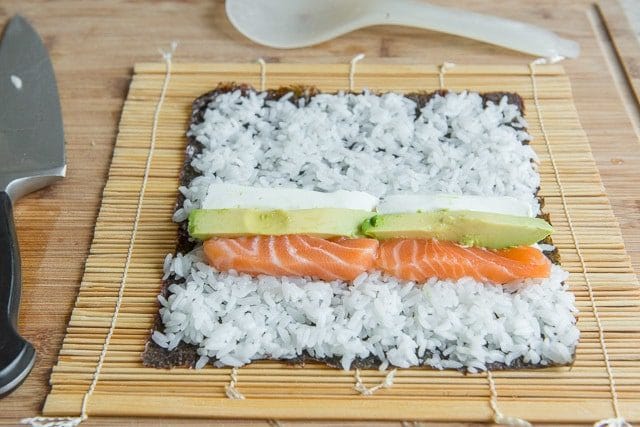
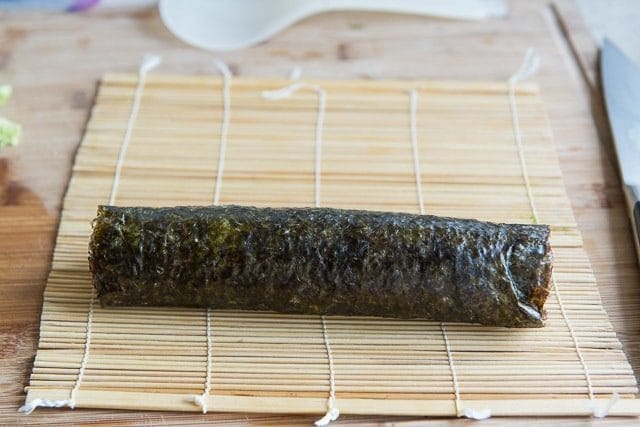
Roll it up tightly, using a bamboo mat. It’s a specific kitchen item, but you can get a decent one for less than $2 On Amazon or at an Walmart, so I think it’s worth having. It ensures the best results for the roll holding together.
If you don’t have one, you can sort of use parchment paper or plastic ward, but you won’t be able to warp it as tightly, so buy one if you plan to make sushi regularly.
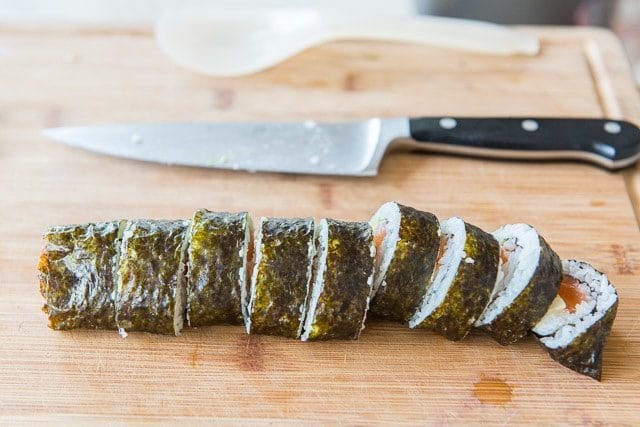
Then use your sharpest knife to cut the sushi salmon roll pieces. I don’t find it particularly better to use a serrated knife. just make sure to use a sharp one!
You may also wish to have a small bowl of cold water or a damp towel at your work station for wiping your fingertips between rolls. Sometimes things can get sticky, so this can really make things easier!
What to serve with your Sushi
Now you are ready to eat the sushi rolls with some soy sauce, picked ginger, and wasabi paste, as desired!